Saturday, 31 May 2014

Pastel Flowers


This is the first time that I have tried to compose an actual picture with the PanPastels! I've done plenty of backgrounds and using them with dimensional mediums but not as the main focal point.
Basically all I did was position the stencils where I wanted them and using the brush loaded it up with the PanPastels and applied it to the paper.
I hadn’t got a plan but just played with it until I got something workable.
Stamped the flowers and circles with versamark.
Sprinkled the embossing powder over stamped images and heated with a heat gun.
Coloured the flowers with Wink of Stella and the circles with the distress pen.
Finished!
Materials used
Watercolour card and Stencils from my stash.
Soft brush.
PanPastels - magenta, magenta extra dark, permanent green shade, bright yellow green shade.
Sheena Douglass stamps - A taste of India-Mandala
Versamark.
Wow embossing powder - verdigris
Wink of Stella - dark pink, orange.
Distress marker - crushed olive.

Challenge entered; panpastels blog

Thursday, 29 May 2014

Music To My Ears


I chose this quote because I think it is quite fitting for me.
I suffer with fibromyalgia and endure constant pain all day every day for me the quote is so true, music doesn’t hurt when it hits you; it brings pleasure and a diversion to the pain.
  • I opened a digikit with lots of music embellishments and saw the plectrum! I have always wanted to learn to play the guitar.
  • I wrote the quote and resized it so it would sit inside the plectrum. When I was happy with the sizes I pressed save and printed it on smooth white card. Cut them out, matted with black card and sparkle medium applied with a very complex tool!!!! My finger lol.
  • Applied the glue to a page and put the tissue on top ironing out any wrinkles with my hand.
  • When the glue had dried I realised that i could see the brush marks through the tissue!!!!
  • Decided to apply Versafine Spanish Moss. Looked a little better, so went with it, keeping fingers crossed it would look ok once the embellishments were in place.
  • Designed a music note stencil on my silhouette. Cut it out on black card. I do have some stencil material but I like to cut my designs out on card so then I can use the 'waste' on one of my projects at a later date. I don’t like to do the same thing all of the time so by doing my stencils like this I don’t get any the same.
  • Laid the stencil over the tissue, using a spatula applied sparkle medium.
  • Glued the plectrums to my page and the 'waste' from my stencil.
Voila another page done.

Materials used
Smash journal
CraftArtist 2 and digikit
Silhouette cameo
Papermania printed tissue
Black card used as a stencil
Imaginations craft sparkle medium - silver
White card for printing
Mod Podge Matt glue
Versafine Spanish Moss

Challenge entered - http://www.thecraftbarn.co.uk/blog/q-l-challenge-passion-music/

Krafty 'Time Flies'


When I read the blog challenged it spurred me on to try the leather Kraft card Sheena Douglass showed on create and craft a few weeks ago. I had to watch the video on her website to refresh my memory.
The only hurdle I had to concur was I don’t have an embossing machine!!! Never fear water and a rolling pin here!!!

  • ·         Basically the technique is to spray Kraft card with diluted glycerin and scrunch up.
  • ·         Then I needed to emboss the card so my method of embossing is spray with water, let it soak in, place the card in an embossing folder and use a rolling pin roll over the folder a few time.
  • ·         I thought the card looked sufficiently embossed but when I applied the ink the pattern didn’t show up as well as I would have hoped.
  • ·         I've done the same method with paper and thin card and got really good results but the Kraft card is 300gsm so far too thick for me. I haven’t much strength in my arms and shoulder so I have a feeling that may be the problem getting a good result.
  • ·         I found in my stash the fob watch chipboard and thought that would display the leather look card.
  • ·         Embossed the fob watch.
  • ·         Glued the card and watch together.
  • ·         Embellished with various goodie in my stash.
  • ·         The lace behind the clock charm I made by threading ribbon through the bottom of the lace, pulled tight then knotted. I made 3 to go on the watch and seeing that the lace was too white I sprayed with a green and gold shimmer spray but once they had dried I arranged them on the clock but they didn’t really show up.
  • ·         So used a clay flower I had coloured for a previous project and pushed a creative expressions brad in the centre.
  • ·         Designed a saying to put on my fob watch, created in CraftArtist.
  • ·         Applied glossy medium.
I'm really pleased how this project turned out because i didn’t really have a plan set out for this one. I usually have a good idea what i want something to look like.
Materials used
Kraft card
Glycerine from the chemist
Embossing folder - Darice
Wow embossing powder - verdigris
Chipboard fob watch - Stamps Away
Shimmer spray - Stamps Away
CraftArtist 2 and digikits
Embellishments from my stash
Martha Stewart clay and moulds
Glossy accents
Creative Expressions  brad
White card for printing
Mod Podge Matt glue

Challenge entered
http://thatscraftychallenges.blogspot.co.uk/2014/05/thats-krafty-challenge_16.html

Thursday, 15 May 2014

My favourite colour palette, spring is in the air with sparkle


I wanted to make a 3d picture but I didn’t want the hassle of dusting it!!!!
Light bulb moment! Lol
There it was in front of me, some packaging!!!!!
  • Firstly I chose the frames I wanted to use.
  • Sprayed with Dylusions.
  • That's when I thought a stencil I had cut the other day and hadn’t fully cut through would look good with the frames with light being able to show through.
  • Made the roses and used pva glue and glitter for the centres and dabbed sparkle medium on the petals.
  • Coloured the sparkle medium with PanPastels. I was really surprised how well the PanPastels and sparkle medium mixed. I'm now addicted to them both as they are so easy to work with.
  • Painted it on various clay flowers, leaves etc.
  • I thought the packaging could do with a bit of sparkle so used a stencil. Even though I say it myself I am well impressed.
  • I needed to make another slightly larger frame to fit the size of the packaging. I cut one out on kraft card, applied versamark then green panpastels. That looked a mess because you could see the lines of the versamark pad! Plan B- stamp large dragonflies around the frame but still looked a mess. Plan C- acrylic paint. Good old trusty acrylic paint saves the day again!! Lol.
  • Now to put it all together mmmmm problem i want the light to show through the acetate stencil but wanted it to stand away from the large pink frame!!!! Because the frames were nesting there was no where for me to use sticky pads or pinflare without it looking messy on the back. So after a few tries of different ways i eventually went for using acetate struts.
  • It worked!!!!!
  • I used pinflair to attach the rest of the clay flowers, leaves, butterflies and owl.
  • I placed the design in the packaging and dropped in the paper flowers.
  • Im not sure if i have over done the decoration but for the time being im leaving it as it is because i can always remove the paper roses.

I hope you like the design and the bright cheerful colours

Materials used
Packaging
Imagination crafts stencil
Craftwork cards embossed frames
Dylusions spray
Green pearlescent paint
Sparkle medium
PanPastels orange, magenta, bright yellow green, turquoise
Martha Stewart air-dry clay, moulds, glitter
Opaque acetate
Silhouette cameo, rose cutting file, stencil 

Pinflare glue

Challengers;
http://panpasteluk.blogspot.co.uk/2014/05/challenge-13-pick-colour-palette.html
http://imagination-craftschallenges.blogspot.co.uk/2014/05/mays-inspiration-post.html
http://thatscraftychallenges.blogspot.co.uk/2014/05/spring-is-in-air-challenge.html

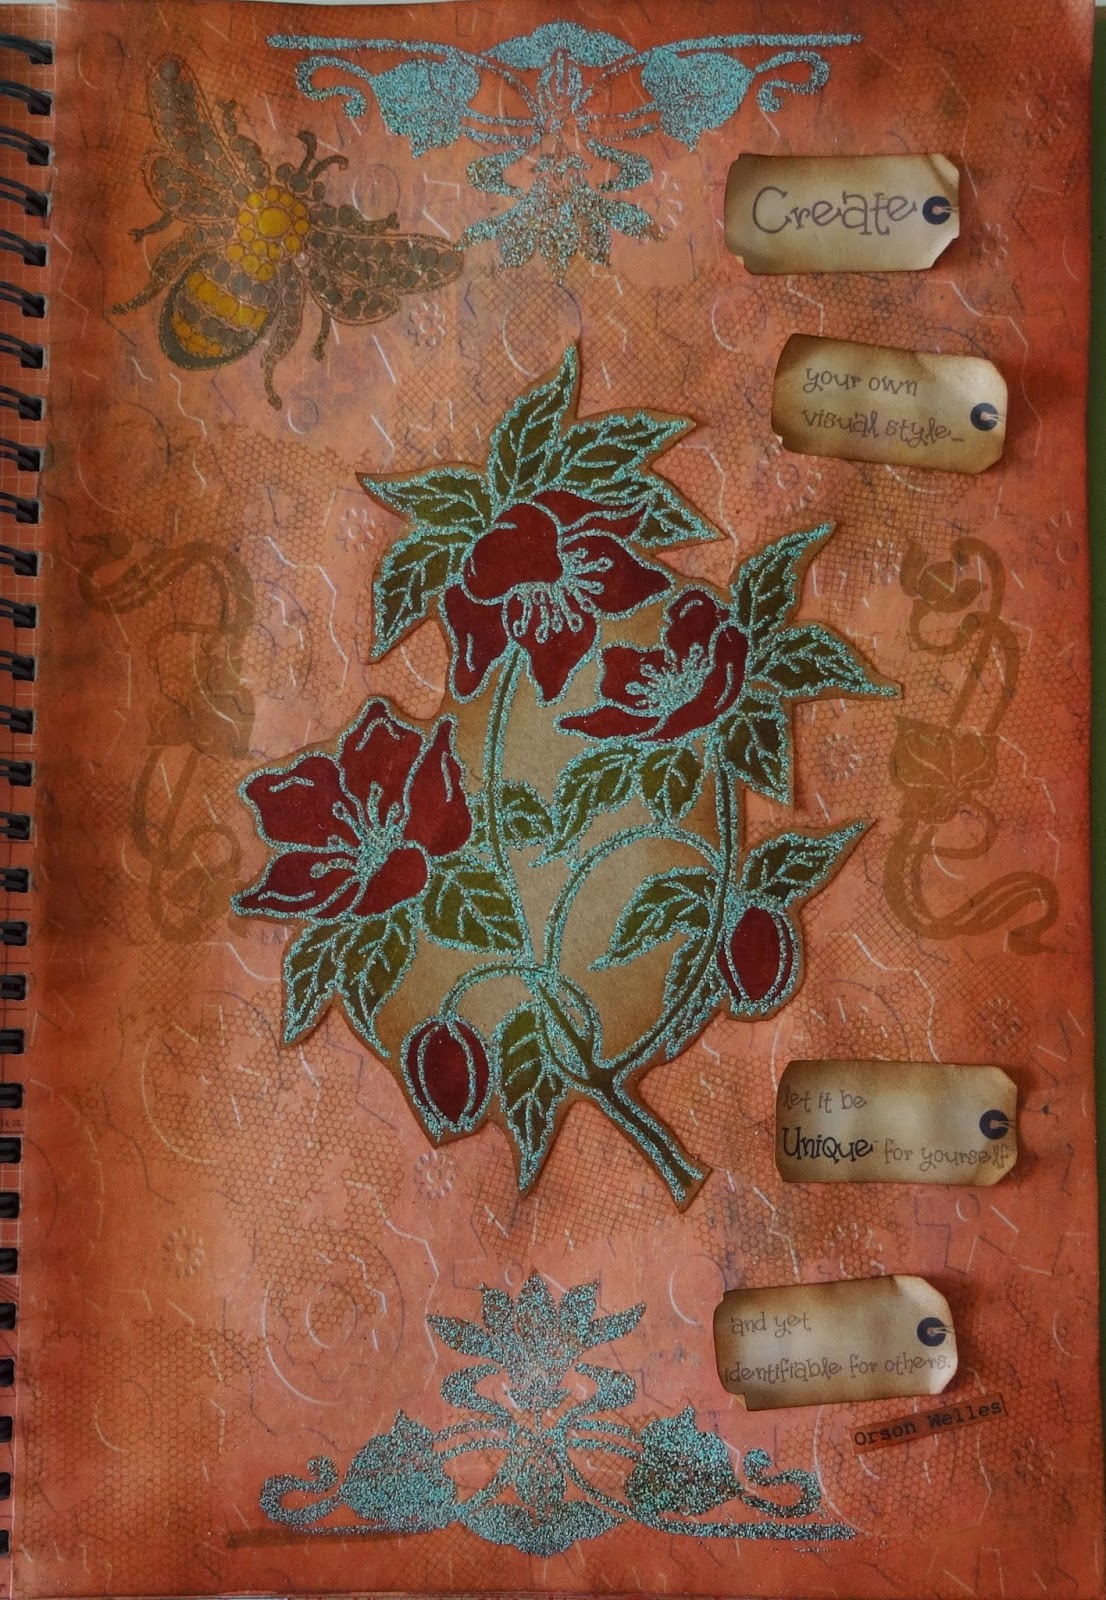
Antique Quote


I decided which quote I would use for the challenge.
I thought about what the wow challenge ANTQUE meant to me. It conjured up images of art deco, old, brown and rusty colours.
Now to start crafting.
  • I chose a digi background and then a digiboss so that i could have the embossed background look but not the bulk.
  • Designed tags with the quote written on them
  • Printed onto smooth paper. Cut and stuck to my journal page. 1st mistake! When i heat embossed the paper sort of bubbled up a bit! Obviously i should have stuck it down before embossing because the heat affected the glue!! I never learn because done this before!! Lol
  • Stamped and embossed background.
  • I coloured in the bee. I have embossed him in gold but it didn’t turn out too good because my ink pad was a little dry!
  • Stamped flower onto Kraft card and coloured in with distress pens. Cut it out.
  • Distress inked the edges of the page and around the flower.
  • Stuck flower and tags to the bumpy page.

Hopefully you can't really notice the bumpy page.

Materials used
CraftArtist software
Digiboss and digikits
Wow embossing powder gold, verdigris.
Versafine inkpad
Sheena Douglass stamps

Quote found on the internet

Challenges 
http://www.thecraftbarn.co.uk/blog/q-l-challenge-unique-fame/
http://wowembossingpowder.blogspot.co.uk/2014/05/may-monthly-challenge-2014-and-winners.html

Purple Rain - My Besties


  • ·         Firstly I designed my background with CraftArtist, using many different digikits because I wrote purple in the search for anything that colour.
  • ·         I then imported the beastie image resized to fit in the frame.
  • ·         Printed it on smooth white card.
  • ·         Coloured in with sakura pens. I was going to use my spectrum noir pens but came across my sakura pens and couldn’t resist using them as I thought beastie suited them. They are so easy to use. I haven’t used them for months and was dreading that they may have dried up but no they all worked!! Can't say that with my spectrum noir pens, a lot of them have dried up and I've hardly used them. I've not looked into it but i wondered if anyone out there has had the same problem.
  • ·         Coloured the background with the spectrum noir pencil.
·         I haven’t made it into a card. I'm going to add it to one of my journal books but haven’t decided which one yet.

Materials used
CraftArtist software
Sakura pens - glaze and soufflé
Spectrum noir pencils


blog challenge;

My Besties UK Challenge - Use the Colour Purple

Saturday, 3 May 2014

Steampunk Flowers n Quote


Firstly I painted my smash book page with green acrylic paint from my stash.
Then the postman came!!!
I received all the materials used in one parcel. Yippee!!! You can imagine how excited I was. I had to open all of them and have a play.
I have no idea which layer I used each medium but I ended up with this background.
I stamped the images onto paper then coloured them with the new spectrum noir pencils, PanPastels and Wink of Stella.
Cut them out.
Glued them to my journal page.
Kraft card flourish cut with my silhouette cameo. Randomly applied Zig glue, waited for that to turn clear then used PanPastels to colour it.
Wrote the quote with Bic pen!.
Voila! Another journal page.

Materials used -
Smash book
Cosmic shimmer- matt chalk paint warm white, shimmer paint peacock.
Deco art - pearlizing medium, dazzling metallic's white pearl.
Distress stains - shabby shutters, peacock feathers, brushed pewter, tarnished brass.
Acrylic paint - green
Stencil - hexagons
Stamps - chocolate baroque steampunk flowers.
Spectrum noir pencils - primaries.
PanPastels - turquoise shade, turquoise, permanent red, bright yellow green, metallics.

ZIG - Wink of Stella Brush Tip Glitter Marker Set - Flower Power and black.


Challenges entered

www.thecraftbarn.co.uk/blog


Saturday, 19 April 2014

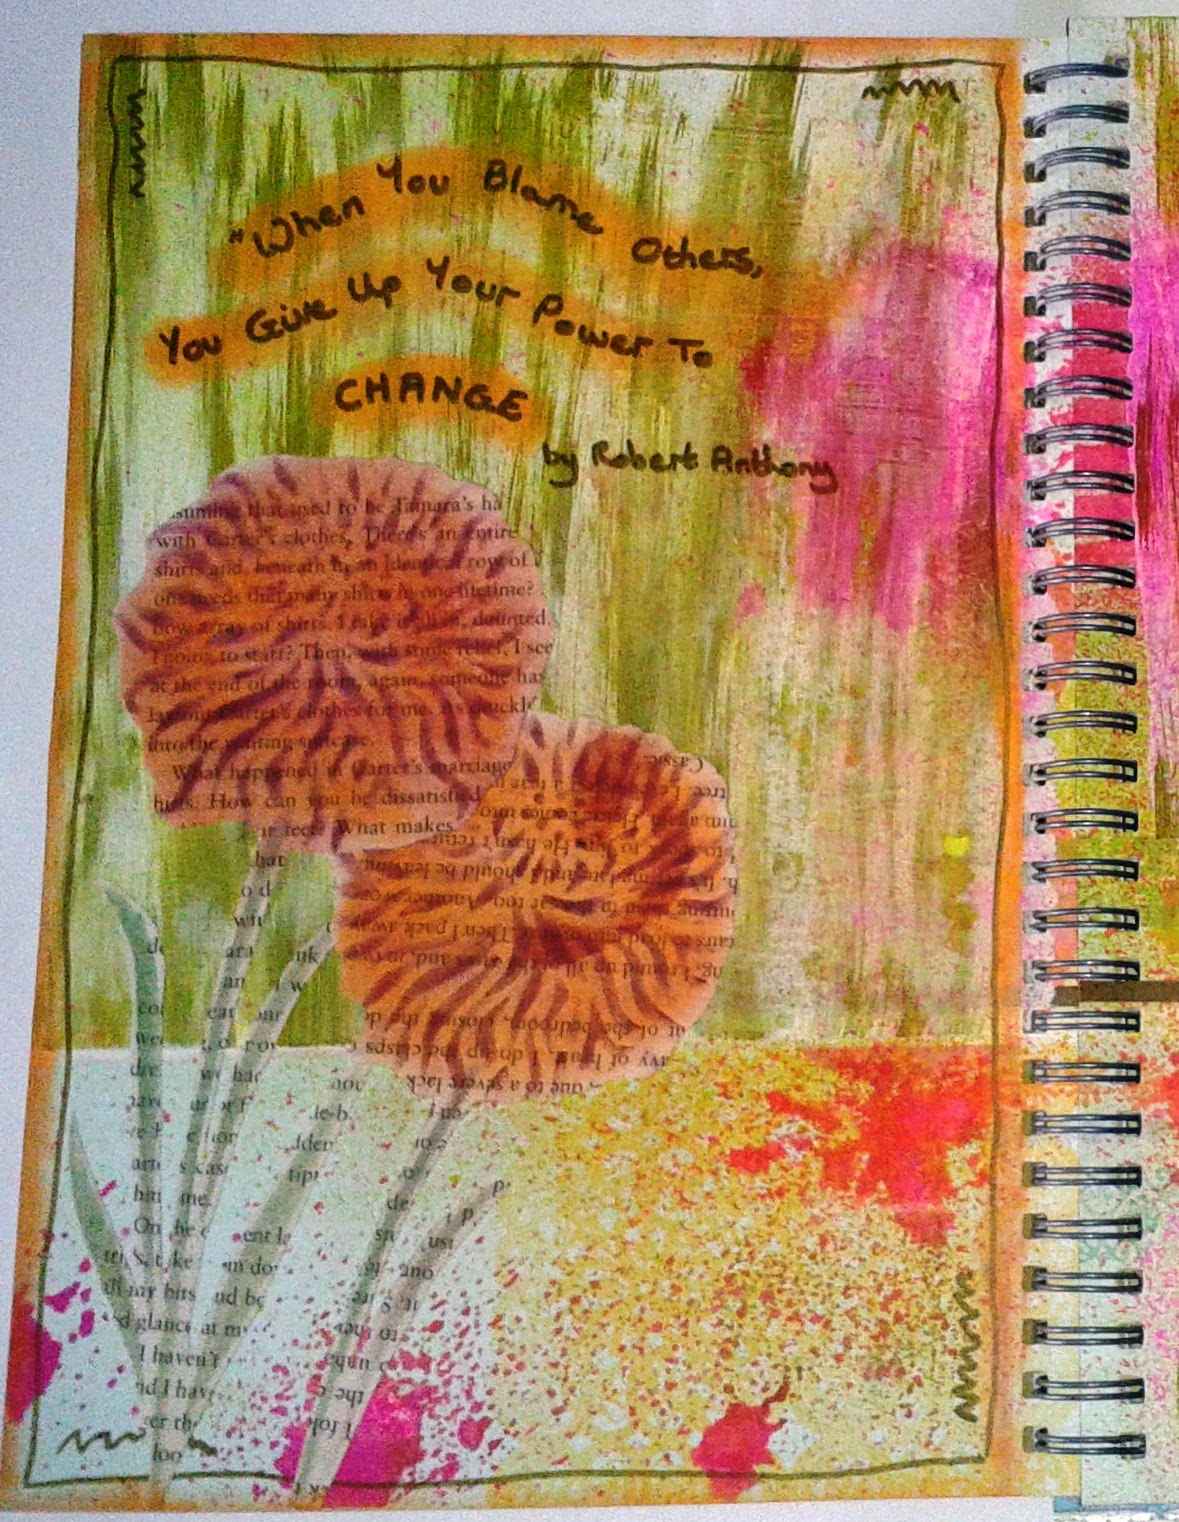
Journal Page Quote Change, Pretty Shabby Chic


  • ·         Firstly I applied gesso to 2 of the pages. I've decided to do the 2 facing pages together to start off with, but then change what I'm doing on each one.
  • ·         Lightly applied green paint in a stripe texture.
  • ·         Sprayed with inks on 1 off the papers and then closed them together so any excess ink soaked into the opposite page and therefore no waste!!!
  • ·         Ripped a few pages out of an old book, sprayed some with ink.
  • ·         But decided to abandon them and instead applied with a sponge orange pan pastel in a circle.
  • ·         Used my mask with pan pastels
  • ·         Cut them out and stuck them on with repositionable adhesive so that I could play around with where to place them.
  • ·         Applied PanPastel in a curvy and wrote the saying with a green pen.
  • ·         Wheyhey my 1st ever journal page.

I did find it hard not to put anything on it 3D because i want the journal to close.
I have got other ideas to be able to display 3D art with an old A4 diary. So watch this space.

Materials used;
Smash book
Dylusions ink spray
Pebeo white gesso
Distress paint
Distress marker
PanPastels
Mask made on my silhouette machine with an image I purchased from their store.

Challenges entered;

Thursday, 3 April 2014

Doesn’t time fly!!!!!!

Hi, can't believe it's over a week since I blogged!
I have sort of been crafting this week. I say sort off cos most of the time i have been surrounded by torn paper!!!
I own a Silhouette Cameo which i have had for ages and haven’t used very much. so when the American Silhouette website had a half price sale on all cutting files I could resist ordering and downloading a few. Feeling enthusiastic and eager to cut and create. I choose a sunflower topiary tree!!!! Not the easiest task!
Taking in mind that I haven’t used the machine very much I now wish I had picked an easier project but like a dog with a bone I started to cut 90, yes 90 small sunflowers!!!

Here goes....
1st attempt paper ripped as it was cutting!!
2nd attempt paper stuck to the cutting mat so had to use a scrapper to get it off.
3rd attempt card too thick! I cut 3 times but when i took it off the cutting mat it still hadn’t cut through. So there was no way I was cutting by hand.
4th attempt success!!! Correct card and cut setting but wrong colour!!
It was kraft card so I spritzed them with cosmic shimmer spray golden fish. Life saver, lol. Then i stuck 3 together to make a total of 30 finished sunflowers.
I was then supposed to cut the centre of the flowers which were 0.5cm wide x 30cm long strips of paper scalloped on 1 side!
So instead I have put blobs of pva glue in the centre and sprinkled with black glitter. Another life saver lol
That's as far as I've got. I will post a photo when I have finished it.
I'm going to enter a few blog challengers this week too so I must knuckle down and concentrate on them for the time being.
We all have days when we lose our mojo and can't think what to make so I thought entering a challenge would inspire me to make something.
And it has so watch this space......
Tara for now

Jane xxxxxxxxx

Thursday, 20 March 2014

Birdhouse

Hi,
I'm Jane and this is the very 1st time that I have wrote on a blog. I was supposed to start it in the New Year but I did sort of!!!!! I got as far as picking my blog name!!!!! I've read loads about how to do a blog but I'm not computer savvy!!! Being of that age where computers hadn’t been thought of being at school lol.
I've looked at many interesting blogs n I want mine to be interesting too to you.

Ps I have loaded some photos of some of my makes and designs, if you click on My Profile I think it will take you to them. Any comments are welcome.
So here goes!!!!!

I try and do a bit of crafting everyday but some days my mojo leaves me and has a sleep for a day or two. 
I also want this to be a journey into the crafting world out there and try and do a journal along the way.
I'm going to start with a photo of a wooden birdhouse a Xmas present for my friend.
I hope you like it and would be kind enough to leave a comment and a link to your blog too.


How I made the birdhouse;
Firstly I painted the MDF with a diluted green acrylic paint to the main body of the birdhouse and then did a brown paint wash on the roof.
Used a mask and 3d paste where I mixed in mica powder to add colour and shimmer.
Stamped images with flitter glue onto Kraft card (then cut them out) and stamped flowers and butterflies straight onto the birdhouse and gilded them. Also gilded 2 pen nibs and a plastic flower shaped button.
I had made the paper flowers months ago.
I left it at that until the next day.
I find that if I do most of the background work and prepare or make the items to decorate it and stand away from it for a while, usually overnight, so I know where to put things. I usually find what I 1st thought would change slightly to something better.
A little help sometimes from friends help too but sometimes not!!!!! Lol
Lastly I varnished all of the birdhouse but thought the roof looked a little dull so varnished with glitter modge podge and added gilded paper clay butterflies.


Materials
Some of the products I used I can't remember where I got them from so for the ones I remember I will list below.

Birdhouse - CuddlyBuddly
Gilding flakes, live, love, laugh stamp collection and Flitter glue - IndigoBlu
Kraft card - Craftwork Cards
Flowers - MCS cd.
Modge podge - QVC
Martha Stewart paper clay and moulds - Create n Craft

Thankyou for taking the time to read my very 1st post. You are welcome to leave a comment.
Jane xxx


Gallery

skull


                                                                         Zoe stamp

                                                                                                                                    1st melt pot items


live laugh love

owl clock


VW Camper

heart mirror