Sunday 10 December 2017

Torn Apart


I do a lot of tearing in my projects because I'm useless at matting and layering so torn edges disguise mistakes!
Inspired by Claire Snowdon.
This project came about because of what's been happening to me lately.
I suffer with fibromyalgia plus I've had numerous car accidents that have left me with various symptoms.  I believe the last accident I had in 1999 was the trigger of fibromyalgia. It's a battle everyday but I'm determined for it NOT totally take over.  But recently with the change of weather I've got a constant flare up of symptoms.  Also,  not being able to socialise in the evening with old friends has made me feel torn and ripped up due to my illness.  
This is what my project represents.  I have wrote fibromyalgia on the background which is surrounded by torn paper and tissue representing being ripped apart and fragile.
Firstly I painted the background and randomly stamped in ink.
Prepared watercolour paper with distress oxides mopped up from my craft sheet then ripped it up into pieces making sure I had enough pieces to cover the background.
Distressed the edges with oxides to try and make it looked burnt.  I'm accident prone and didn't want to use a lighter to actually burn the edges!
Arranged on the background. Found that there was some gaps because of curling the edges of the torn pieces! So added some stamped tissue I had done awhile ago.  Which fits in with what I wanted to express with this project.
Coloured some staples with marker pen then stapled the pieces together and to the background.
Wrote fibromyalgia but making sure it wasn't dominating the project.
Then heat embossed a inspiring sentiment, ripped, distressed and stapled to the background .
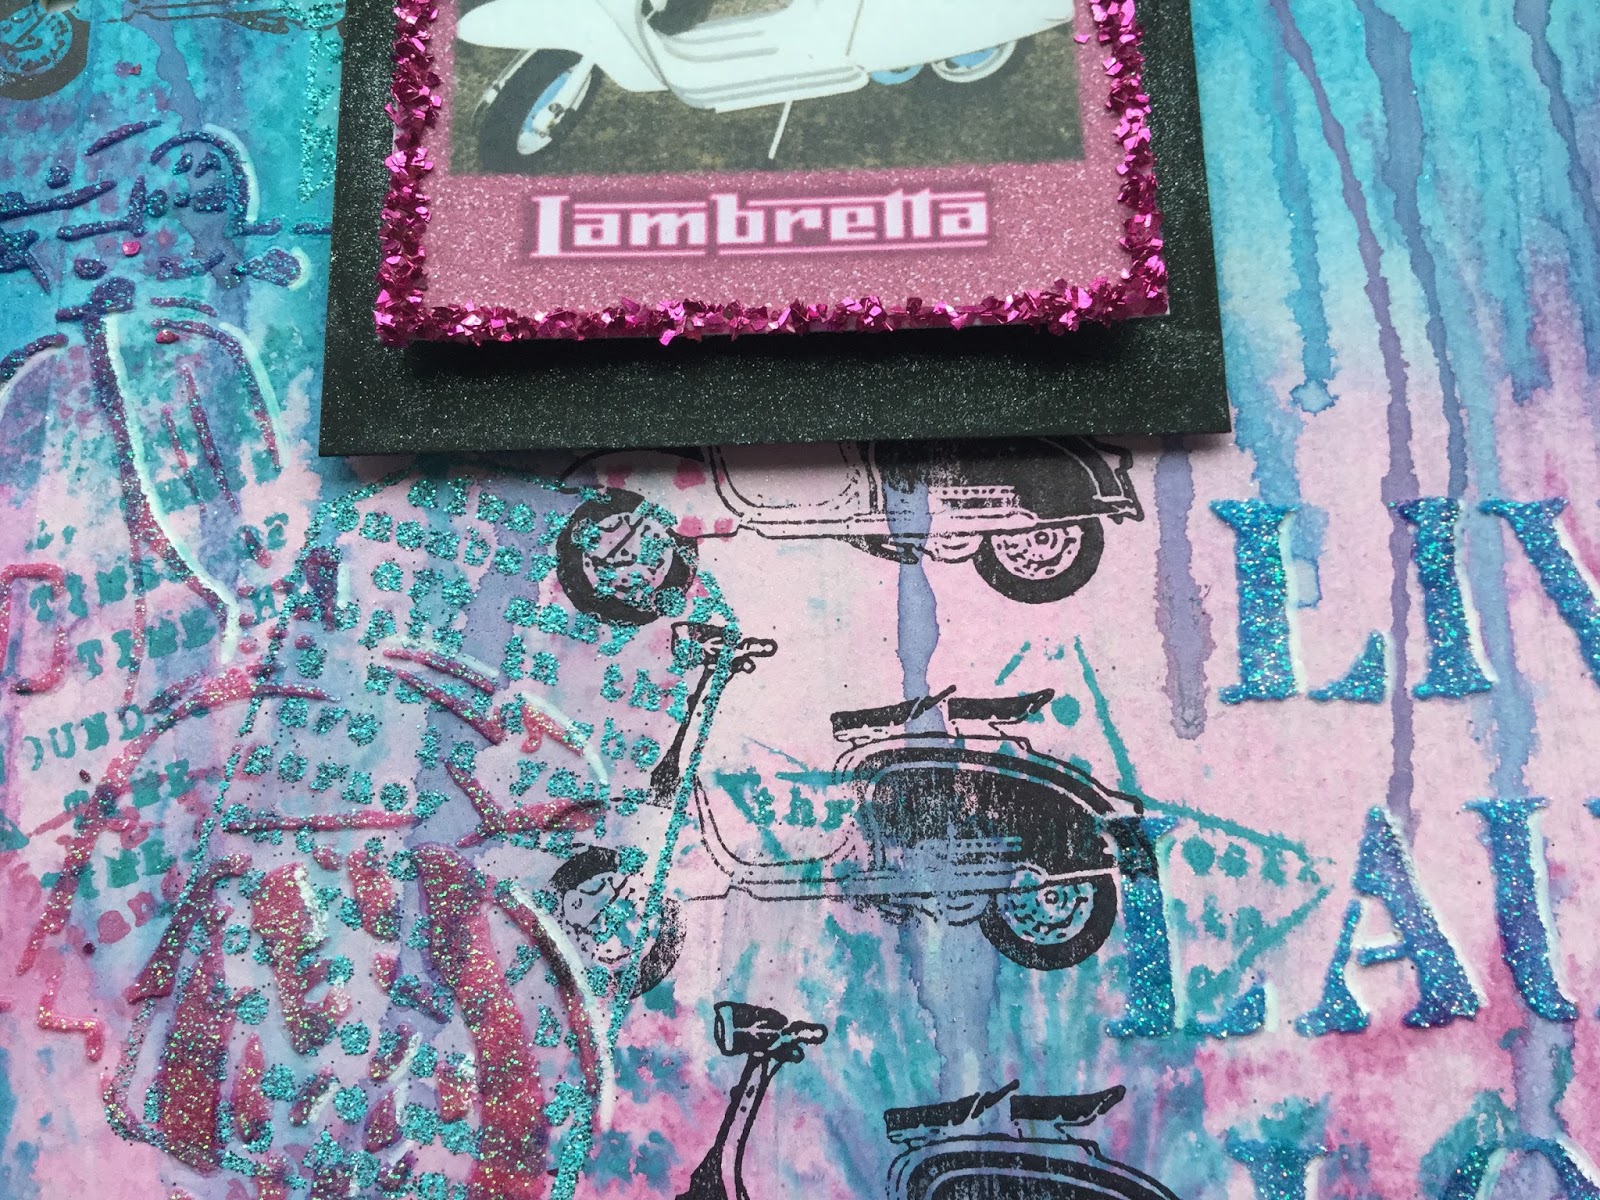
Also heat embossed a lambretta which is something I absolutely loved but unable to ride or join in with the scooter scene anymore.
I love rust so added rusty cogs, butterfly and flower.
Finally stamped and embossed butterflies and dragonflies representing new beginning and fly free.

Materials used;
PaperArtsy- Fresco Paints- mermaid, south pacific  Stamps- ETS02
Distress Oxides- black soot, vintage photo, wilted violet, peacock feathers.
Lavinia stamps
Visible Image stamps
Cogs, butterfly, flower from stash.

Challenge entered;
PaperArtsy

Wednesday 22 November 2017

Miracle White


The title of this piece says it all for me,  it's a miracle there are no marks on it from stray paint,  powders etc.
Inspiration from Miriam Grazier
The first background layer - applied texture paste around the edge of the card.  Stamped into it which wasn't very successful so on the areas I didn't get a good impression I stamped and embossed the leaves. Applied guiding polish over the texture paste.
2nd layer - applied texture paste with a stencil.
3rd layer - stamped and embossed flower.  The words I used the texture paste and then sprinkled with large glitter.
Final layer - stamped and embossed flowers. Also applied guiding polish all over the background. Used a white paint pen for the grass.  3d glue to the flowers and glitter to the smaller flowers. The sentiment  is on a separate layer as I did get a mark in that area so stamped and embossed on another piece of card!
Distressed all the edges of the layers then 3d glue gel to stack them up.
Displayed in a box frame.

Material used;
PaperArtsy - stamps EKC06,ELB31,JOFY38, stencils ELB045,PS060
Texture paste
Cosmic shimmer - gilding polish pearl lustre, crystal chips
Embossing powder - seaform white
3d glue - white
3d glue gel

Challenge entered;

Sunday 12 November 2017

More Rust!!!!


This is the project that kept going wrong!!
Inspiration from Sue Carrington
I used versamark to stamp the flowers, then sprinkled with rusting powder and once covered gently shook off the excess. At this point I thought ‘success’ only to be disappointed when I spritzed with vinegar because the stamped images looked blurred!!! Not to be defeated I left it overnight.
The next day the images were visible but with a halo of rust.
So then I sprinkled infusions over the fabric and spritzed with water. Waited for it to dry. Result! an even bigger halo of rust around the images!!!!
Then when I picked it up to place on the canvas the rust started to drop off! So to stop this happening I brushed on a couple of coats of matte medium.
This seemed to do the trick of containing any loose rust.
Next, on a canvas I painted patina green, sprinkled rust over it whilst wet then spritzed with vinegar. Left it overnight.
The rust looked good but the green looked too ‘clean’ to applied paint to ‘dirty’ it up.
Then I applied the fabric with matt medium.
To define the stamped images I used stencil glue then guiding flakes.
I then glued ‘rusty’ die cuts to the background and finally 3d glue.
To say I was going to bin it I think it doesn't look too bad now!!!

Materials used;
Paperartsy-fresco paints and stamps.
Rusting powder.

Challenge entered;

Thursday 9 November 2017

Rust Rust and More Rust!!!


I just love rust! After years of owning lambrettas I'm used to rust.
Inspiration for this piece was from  Sue Carrington's  post but i went off onto a  tangent for what I actually made!
The piece I started with involved stamping onto fabric with Versamark and then sprinkling rust powder over it. BUT I'm not totally happy with my results and i feel it  needs a lot of tweaking. Hopefully I can finish it before the challenge ends!
So for this project I recreated rust (hopefully you agree!) on greyboard.
I just kept applying layers of paint (listed below) until I got rust.
Then using distress oxide ink I stamped onto the background and sprinkled with rusting powder then spritzed with vinegar. I used vinegar as I get a better result than if I used just water. I then had to wait for the magic to happen! The house does smell like a chippy! Left it overnight and the next day I did have rust but the stamped images were unrecognisable!
Not to be defeated I stamped around the edges with stencil glue. Initially I was going to use flitterglue by Indigoblu as it's a really strong glue that stays tacky until something is applied/sprinkled on top of it but when I opened the tub it had gone off so the only alternative to hand was stencil glue.   
I then sprinkled rusting powder over the glue and it stuck fast. Spritzed with vinegar and left overnight.  Success! I have rusty stamped images.
I repeated the rust techniques onto the MDF shaped as a scooter.  I know it is a Vespa not a lambretta but I couldn't find MDF lambrettas anywhere.
Finally I stuck the scooter to the background.

Materials used;
PaperArtsy Fresco paints Green Patina,Mud Splat. Stamps ETS02,ESA04
DecoArt Media Fluid Acrylics Payne's Grey, Quinacridone Gold
Distress Oxide Cracked Pistachio
Crafty Notions Rusting Powder
White vinegar
Challenge entered; PaperArtsy

Saturday 28 October 2017

Pearly Picture


When i saw Helen's autumn leaves project I was intrigued by the pearlescent skins!
I thought I have to try this technique.
Firstly, using archival ink I stamped onto the craft mat (my stamp did slip a bit). Then  painted some old pearlescent paint over the ink trying not to smudge as i brushed. The paint was a little too thick, next time I will mix in a little gel medium so it's easier to brush over the ink images. I left them to dry overnight, then I carefully peeled them off the mat and to my surprise it worked! They are very fragile and will stick to each other. If like me I just popped them on my craft table and the next time I looked at them they were all stuck together! Probably happened when putting things on my craft table this has caused a breeze making them fly across the surface of the table!

This project evolved. I didn't have a plan i just went with the flow.
For the background, i covered card with Pewter Fresco paint and whilst still wet I sprinkled infusions.
When dry I placed the skins in various places.
Then using Pearlescent ink and Pearlescent paint randomly stamped images.
The skins just looked ‘plonked on’ so i applied a couple of thick layers of gloss medium to try and bring the background together.
On another piece of card I sprayed the starbursts then stamped and cut out the flowers.
The cogs and frame I coloured by mopping up starbursts that had not hit the background.
Then I stamped the flower head on a small piece of acetate with paint and ink and stuck it to the frame.
Arranged and adhered the flowers, cogs and frame.
Finally applied the crystal drops. I really like how the drops have sunk on the cog, a happy accident!

Materials used;
Paperartsy Stamps-EKC07,ETS02. Infusions-Blackcurrant. Fresco Paint-Pewter
Lindy’s Stamp Gang Starburst Sprays-Icicle Creek set
Brilliance Ink-Starlite Black
Tonic Studios Nuvo Drops-Gold, Purple
Stamperia mould
Pearlescent paint
Gloss medium

Challenge entered;


Sunday 15 October 2017

Glitzy Lambretta J125


Inspiration from  Raquel Burillo
Firstly I applied gesso to grey board.
When dry, brushed on sparkle pens diluted with a little bit of water.
Next, with Distress Oxides I randomly stamped on the background, in between layers spritzed with water to make drips. Dried with heat tool.
Then I Stamped with oxides and heat embossed. To make them standout more i used a water brush to take away some of the colour in the stamped area.
With glitter paste I applied it through a scooter and ELB045 stencil
Using archival ink I stamped the Lambretta.
Around the edge of the background I applied pva glue then sprinkled with chunky glitter.
Printed a photo of my Lambretta J125 I used to ride a few years ago. Sadly I can't ride anymore due to chronic pain! I miss it so much so I have decided that with each challenge I will use  a photo from my scooter rally years.
Then I edged the photo with glitter, matted it onto black card and used 3D gel to stick it to the background.
Finally added white pen to highlight the glitter paste images.

Materials used;
Paperartsy - Stamps ELD31. Stencil - ELB045
Distress Oxides - Peacock Feathers, Picked Raspberry
Tonic Studios Nuvo Glimmer Pastes - Blue Topaz, Pink Opal
WOW Embossing Powder - Totally Teal
Sheena Douglass - scooter stencil
Stampendous glass glitter - Fuschia
Archival Ink - black

Challenge entered;


Thursday 12 October 2017

Monster Glitter


Firstly a big thank you to paperartsy for winning the last challenge. It took me ages to choose the stamps I wanted because I love them all!
I'm not a fan of loose glitter but if it's encapsulated in a glue or medium I am more likely to use it. I was surprised how much glitter I have and to choose which ones to use was difficult.
My inspiration for this project was mentioned in the introduction post using WOW embossing powder, link to video here
Also Chris Cresswell gave me the idea to use my Zinski monsters.
And Dounia i have the same problem with glitter! Blog post.

Girly Glitter Monster
The background is infusions spritzed with water. When thoroughly dry i applied matte medium and sprinkled glitter all over.
Stamped the monsters on white card and applied WOW embossing powder.
I coloured in the body, feet and eyelids with sparkle pens, cut them out.
Stamped on top of the glitter background with oxides. I was aiming for a contrast of the matte with bling but the glitter shines through!
Using 3D gel I adhered the body, feet and eyes on top of the background image.
Glossy accents to eyes.
The ‘Little Monster’ sentiment i designed on my laptop.

Boy Glitter Monster
The background is acrylic paint sponged onto pearlescent card. I can't remember which paint it was as i did it awhile ago.
Sprinkled infusions onto white card, spritzed with water.
Stamped the monsters and embossed with WOW powder.
Using a clear sparkle pen coloured over the infusions to bling him up.
With my glue gun i dribbled glittery glue in a swirl onto my craft mat. When dry I stuck it to the background.
Stamped the monster and cloud on the background.
Using 3D gel I adhered the body, feet and eyes on top of the background image.
Glossy accents to eyes and pom pom on hat.

Both placed in a frame.

Materials used;
Paperartsy stamps ESA04
Distress Oxides - wilted violet, cracked pistachio
WOW embossing powder - sensational sage, persian indigo
Spectrum Noir Sparkle Pens
Glitter
Glossy accents
Hot glue

Challenge entered;
paperartsy.co.uk


Thursday 28 September 2017

Shine Out


metallic glaze applied on top of paint

metallic glaze mixed with paint

My inspiration for this project was a blog post by Jennie Atkinson and Leandra's Metallics video .
I started by gluing scraps of embossed paper to a 12 inch square card as i want to display this in a 3D frame. Also die cut scooter.
Applied black gesso all over.
After watching the video i mixed the metallic glaze with the colours i had chosen. I did a couple of layers but disappointed that the metallic wasn't shining! Then i realised that the metallic being a glaze was meant to be applied over the top of the paint like a glaze. Lesson to self read the label and the answer will be there!!!
Stamped with paint then covered all the background with metallic glaze.
Printed some photos of me when i was a teenager. I'm planning to incorporate photos of my early years as a punk, skinhead and scooterist because I've had so many different hair and clothing styles and i want to be able to show my great nephews and niece what it was like in ‘My Day’. I'm  jealous that these days bright pink or blue hair is ‘normal’ because back in the day some people thought i was ‘weird’.
Using mini clips and screw head brads to hold the photos in place so i am able to change them at a later date.
Lastly added some embellishments and mounted into a 12 inch frame.


Materials used;
Paperartsy Fresco Paints - south pacific, tango, green patina, metallic glaze.
Paperartsy Stamps - ZA01, ELB31
Black gesso
Mini clips, brads, die cut embellishments.


Challenge entered;

Thursday 21 September 2017

Fairy Wishes


I'm fairly new to lavinia stamps. A while ago I bought some cutting files which i absolutely love, then i bought some stamps and now i'm hooked!
The stamps i have used on these 2 cards are the ones that were on Hochanda.
1st card
I die cut some watercolour card, sprinkled scarlet, orange and brown brushos then spritzed with water.
Using black archival ink i stamped the fairy and script.
Coloured the fairy wings with glitter pen.
Matted and layered onto card.
2nd card
Using my Tim Holtz stamping platform i mounted an oval media plate.
With distress ink pads i dabbed on colour
Spritzed with water and printed onto the card.
Stamped fairy and script in black ink.
Coloured the fairy wings with glitter pen.
Matted and layered onto card.

Materials used;
Archival ink - black
Brushos - scarlet, orange, brown
Distress ink - Rusty Hinge
Distress oxide - Vintage Photo
Tim Holtz stamping platform
Nellie Snellen oval media plate
Sakura glitter gel pen
Watercolour card

Challenge entered;


Sunday 3 September 2017

Owl De-stress Twit-You


My inspiration came from Helen Chilton
Much the same as my last post De-stress, dip,swipe card into distress oxides on my craft mat, sprayed with water.
The owl is cut out of kraft card and dipped in oxides to achieve a rust effect.
On the die cut circle I dipped it in oxides, dried and then blended oxides through a mushroom stencil. To ground the mushrooms i stamp leaves with oxides.
The white cotton material was experimenting how the oxides would layer. I found that to dampen the material with water first then dip into oxides on the craft mat was more effective.
When the cotton eventually dried i blended oxides through a stencil. Sprayed with a little bit of water then dried.
Stamped the sentiment in oxides. Brushed on a gloss medium to the material and owl. I went around the material with a tailor's marking tool. I had wanted to fray the material but because of the gloss medium it wouldn't! Note to self- fray before matt medium lol.
Choosing a clean page in my Pink Pig journal with black pages i randomly stamped leaves and small circles.
Arranged then stuck the owl, circle and material onto the page.
Doodles with paint pens then finally finished with a 3D glitter glue.

Materials used;
PaperArtsy stamps, stencils
Distress Oxides
Paint pens
Pink Pig journal

Challenge entered;